How to Install and Configure the Zaptiva Web Connector for Sage 50
Connect
1. Click on Connection Option in the left pane.
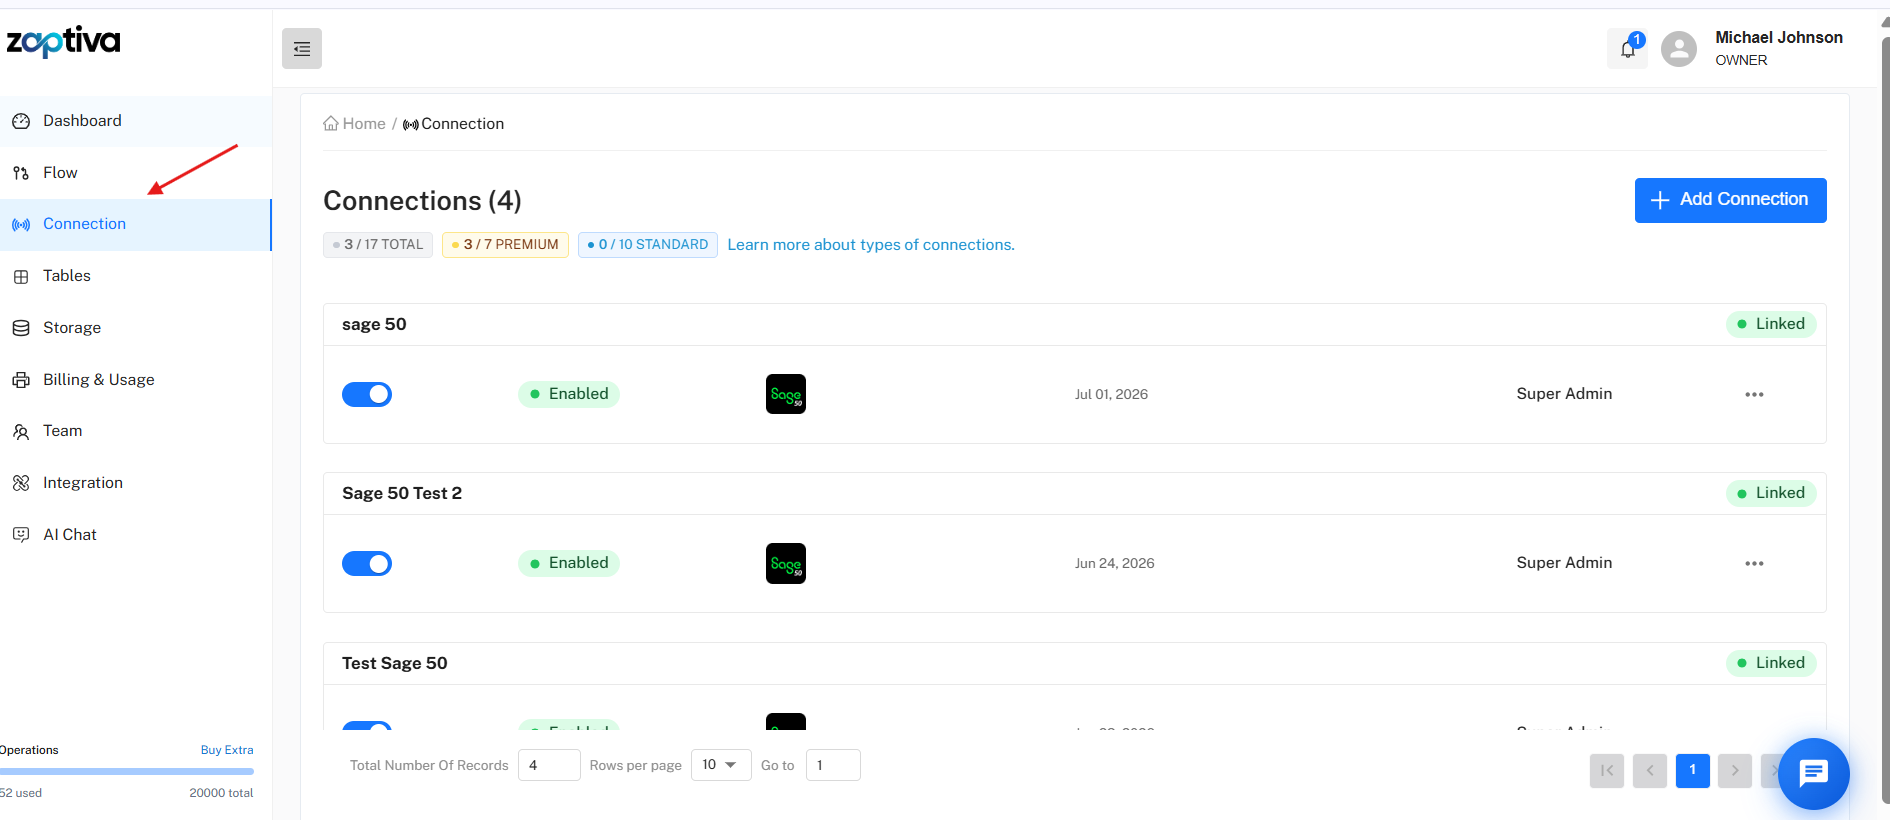
2. Click Add Connection. Enter a Connection Name, then
select Sage 50 from the App Name list.
Click Next to continue.
3. In Sage 50, open File → Open Company and copy the Company Name and Directory values exactly and paste them the corresponding fields in Zaptiva and Click Create Connection.
Install the Zaptiva Web Connector
1. Click Download Zaptiva Web Connector For Windows.
2. Install and launch the Zaptiva Web Connector on the same system where Sage
50 is installed, then click Add Connection.
3. Log in to your Zaptiva account, navigate to Integration, generate or copy the API Key, and paste it into the Zaptiva Web Connector and Click on Next.
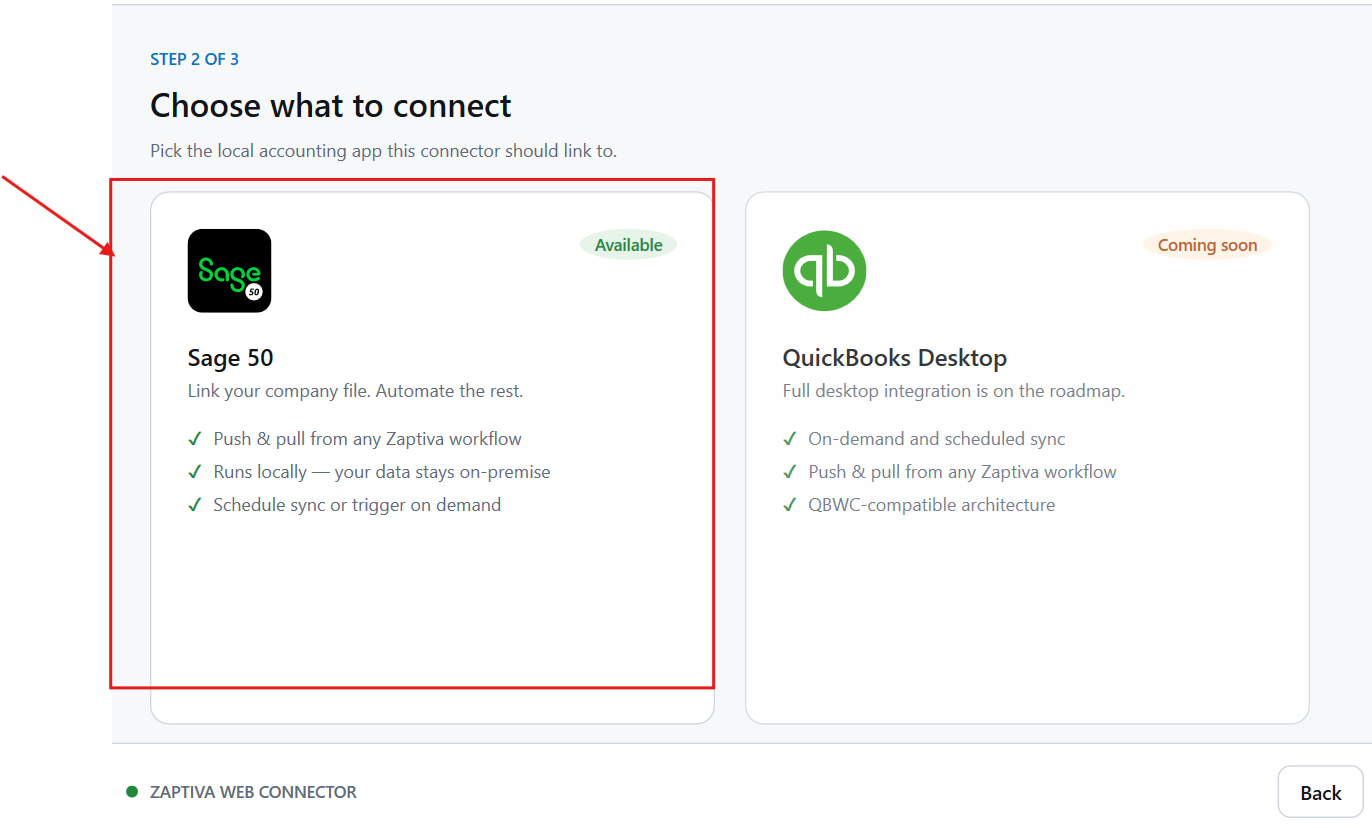
4. Select Sage 50, then
select the Sage 50 connection you created and click Link this Connection.
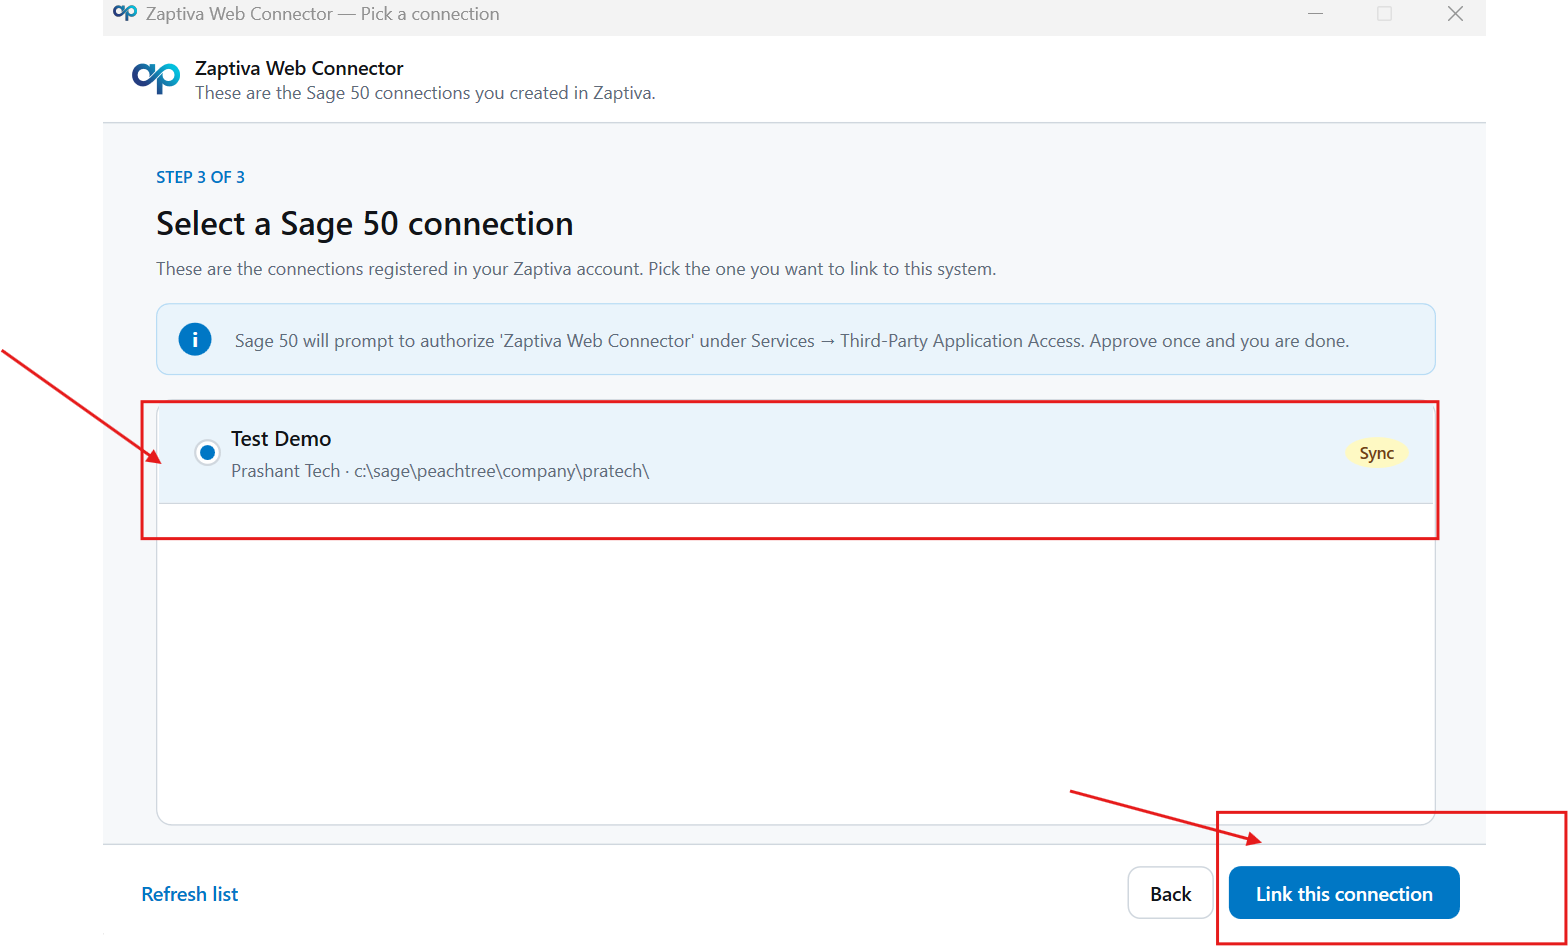
5. Sage 50 will prompt you to authorize the Zaptiva Web Connector under Services → Third-Party Application Access. Click OK to complete the setup. (If the authorization prompt does not appear, close and reopen the Sage 50 company, then click Link this Connection again.)
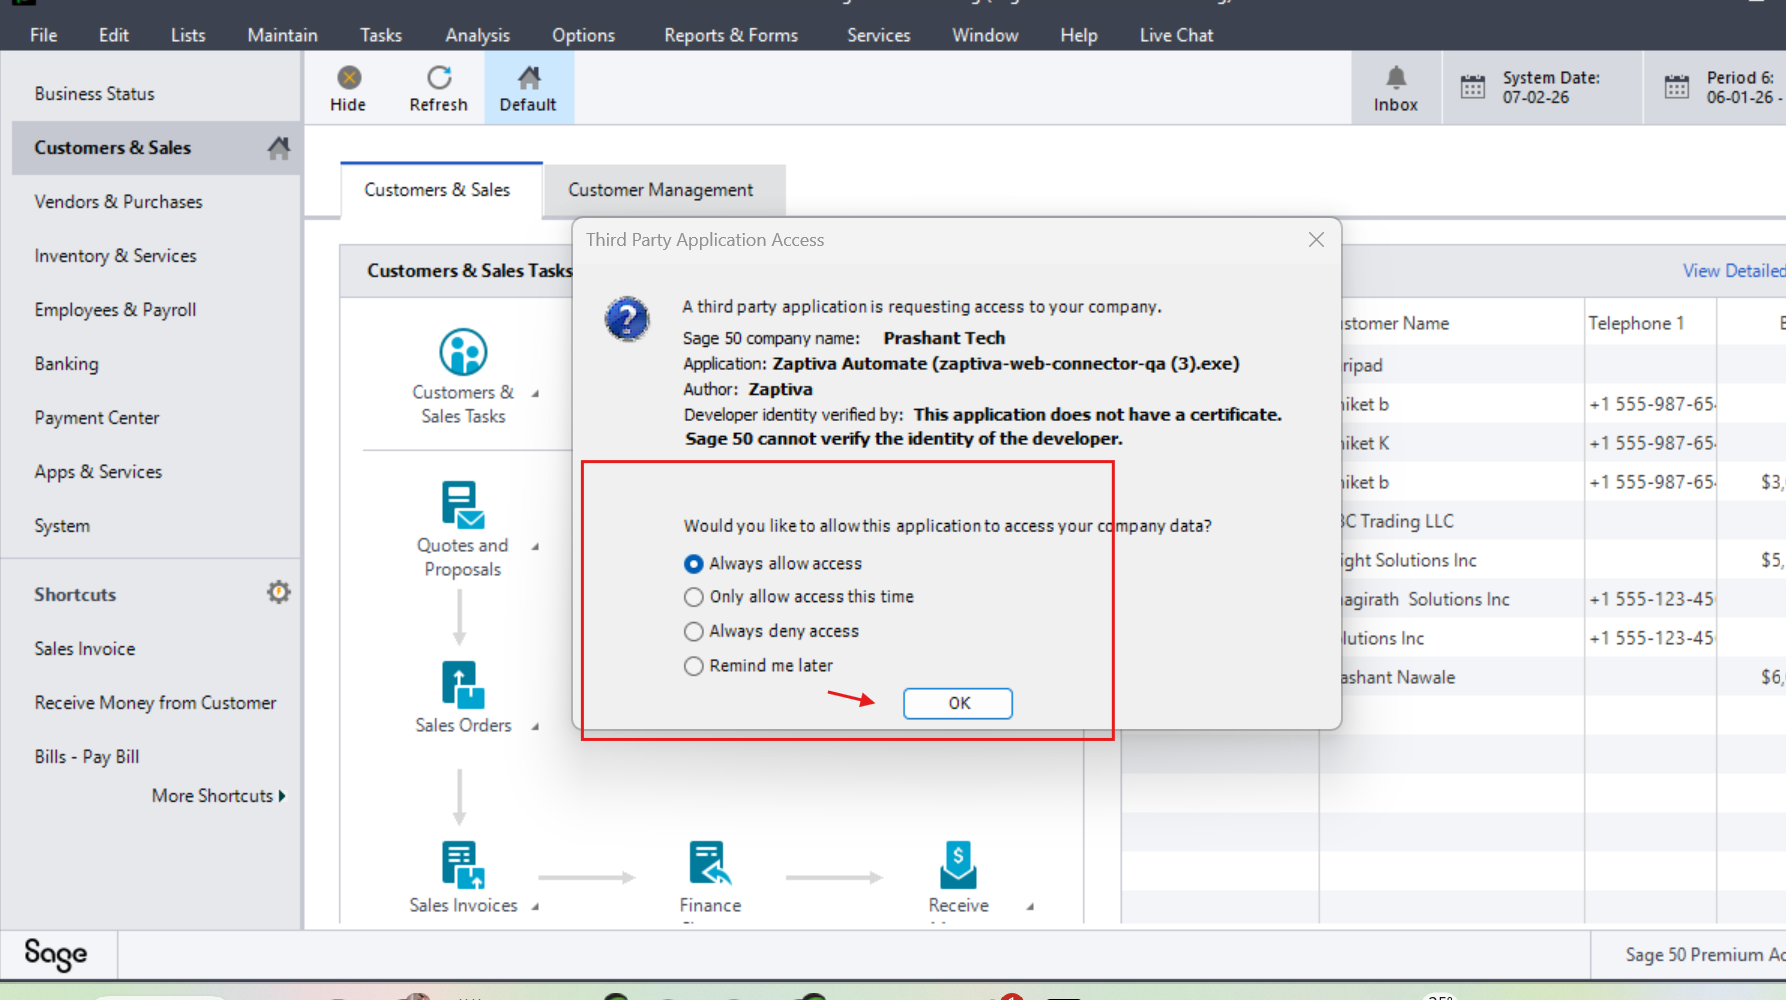
5. Sage 50 will prompt you to authorize the Zaptiva Web Connector under Services → Third-Party Application Access. Click OK to complete the setup. (If the authorization prompt does not appear, close and reopen the Sage 50 company, then click Link this Connection again.)
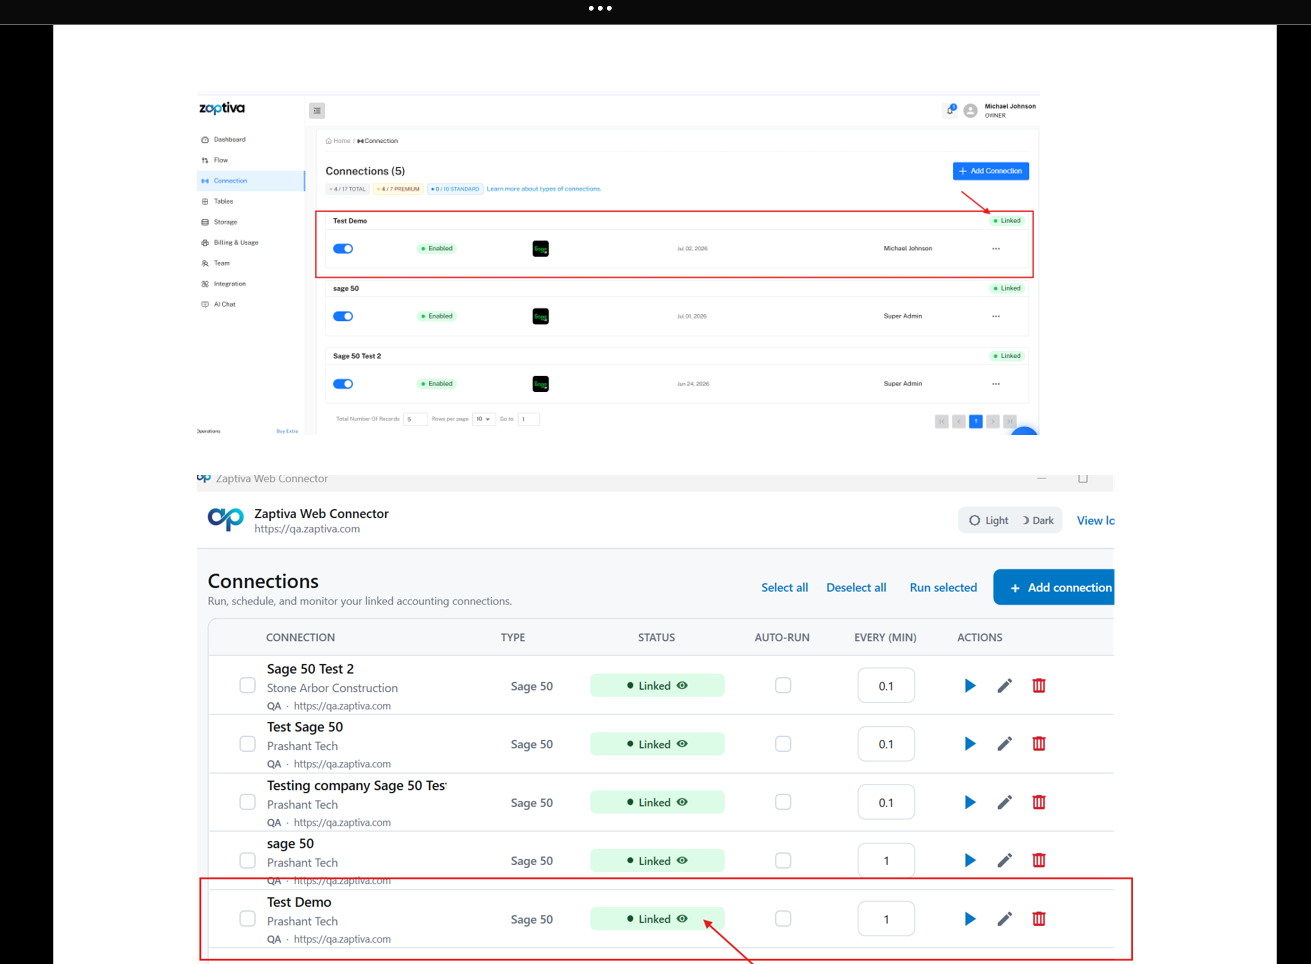
6. The Sage 50
connection is now successfully linked and is ready to use. The connection
status will be displayed as Linked in both the Zaptiva Connection module and
the Zaptiva Web Connector.
Related Articles
QuickBooks Web Connector: Complete Guide (Open, Auto Run, Kill & Reopen)
1. What is QuickBooks Web Connector? QuickBooks Web Connector (QBWC) is an application that allows external web applications to communicate with QuickBooks Desktop. It acts as a bridge between QuickBooks Desktop and third-party applications such as ...Creating a connection to Sage Intacct
Follow the steps below to create a connection to Sage Intacct in Zaptiva: Connect 1. Log in to your Sage Intacct account to approve the authorization and allow Zaptiva to access your Sage Intacct account, navigate to the Company Information page in ...Zaptiva Release Notes
v2.21.0 Beta Release Date: July 31, 2026 MAJOR FEATURE: Google Sheets Integration: Added Google Sheets integration with spreadsheet create, read, update, and delete actions. Coupon & Promotion Code Management: Introduced a Coupons module in the Super ...Zaptiva Apps Categories
Apps Categories Zaptiva provides apps that allow users to connect external systems, databases, and file formats within automation workflows. These apps are organized into three categories: Core Apps. Standard Apps. Premium Apps. Core Apps Core Apps ...API Connector Overview and Configuration
API Connector Overview and Configuration Follow the steps below to configure and use the API Connector in Zaptiva: 1. Navigate to the URL: https://app.zaptiva.com/ 2. Log in to your Zaptiva account and open the flow configuration page to create a ...