API Connector Overview and Configuration
API Connector Overview and Configuration
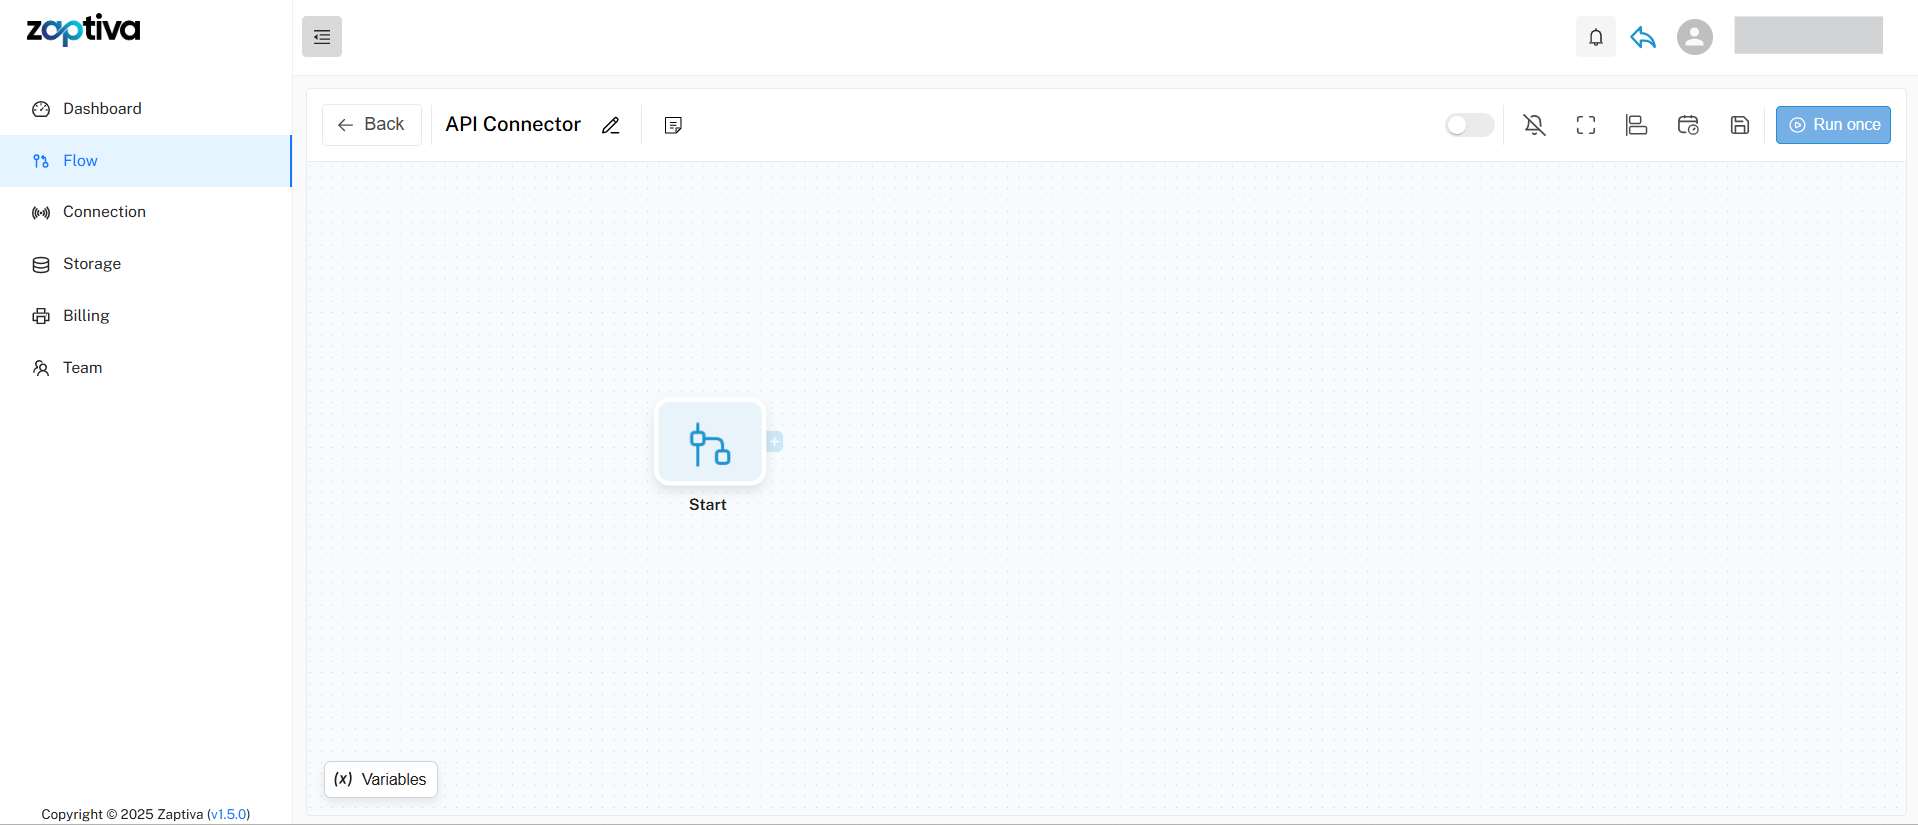
Follow the steps below to configure and use the API Connector in Zaptiva:
1. Navigate to the URL: https://app.zaptiva.com/
2. Log in to your Zaptiva account and open the flow configuration page to create a flow using the API Connector.
1. Navigate to the URL: https://app.zaptiva.com/
2. Log in to your Zaptiva account and open the flow configuration page to create a flow using the API Connector.
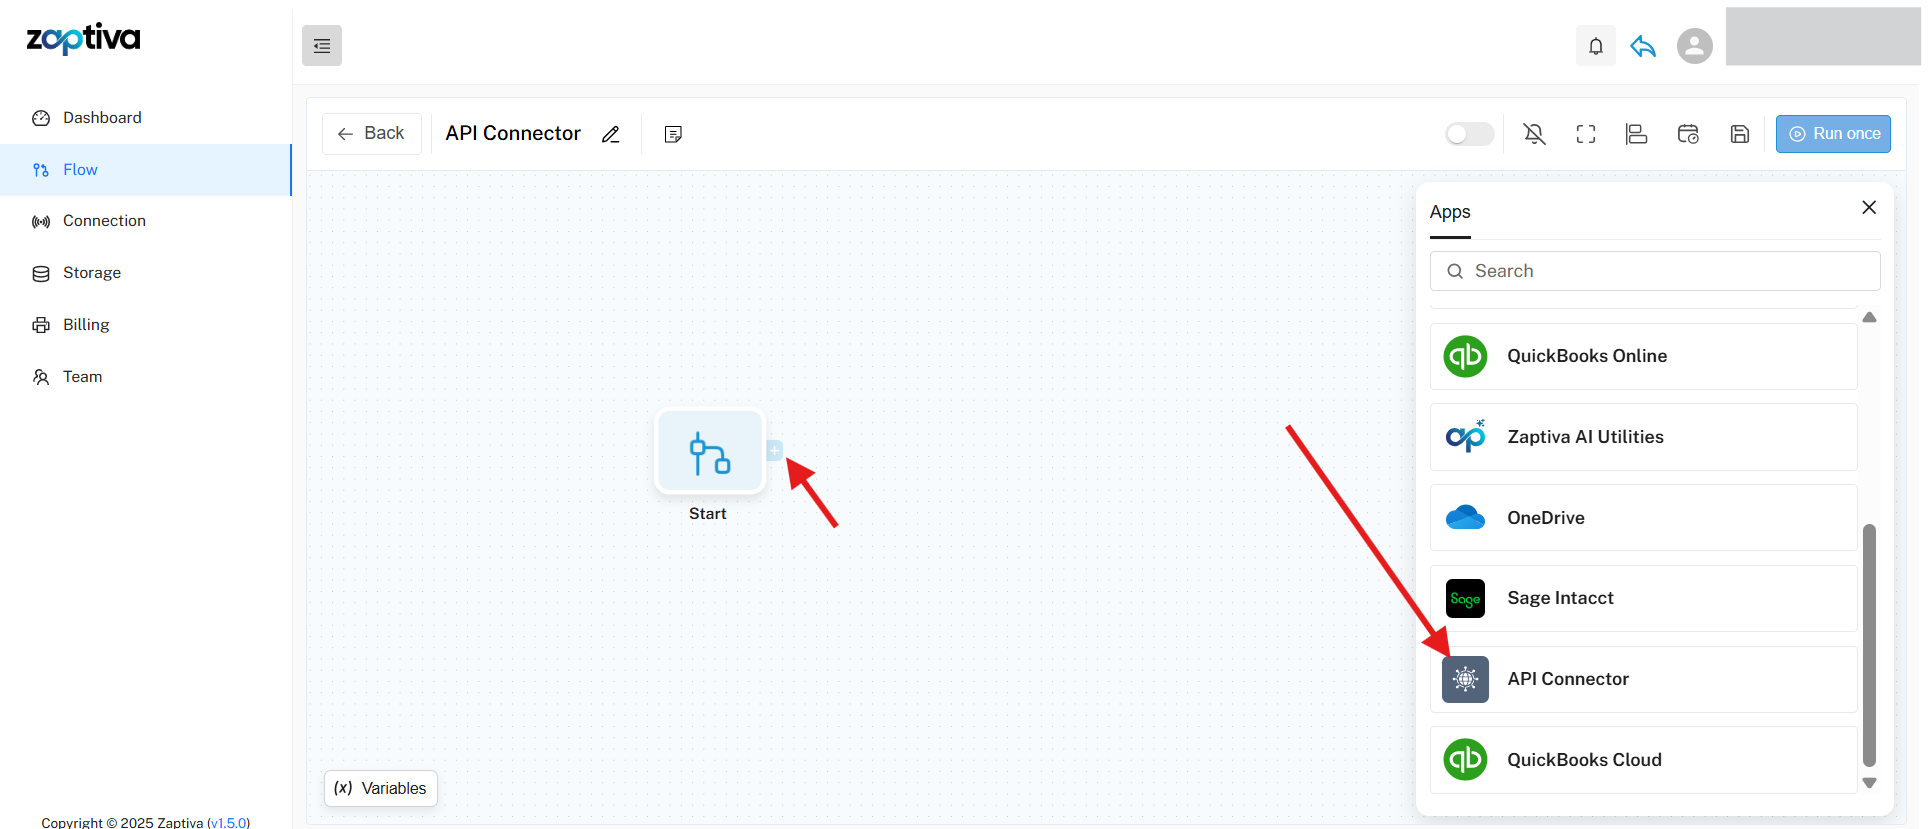
3. To add the API Connector to the flow, click the “+” icon at the start component and select HTTP Request under the API Connector app from the Apps menu in the sidebar.
4. After clicking the HTTP Request operation, the configuration panel opens, allowing you to fill in the required request details.
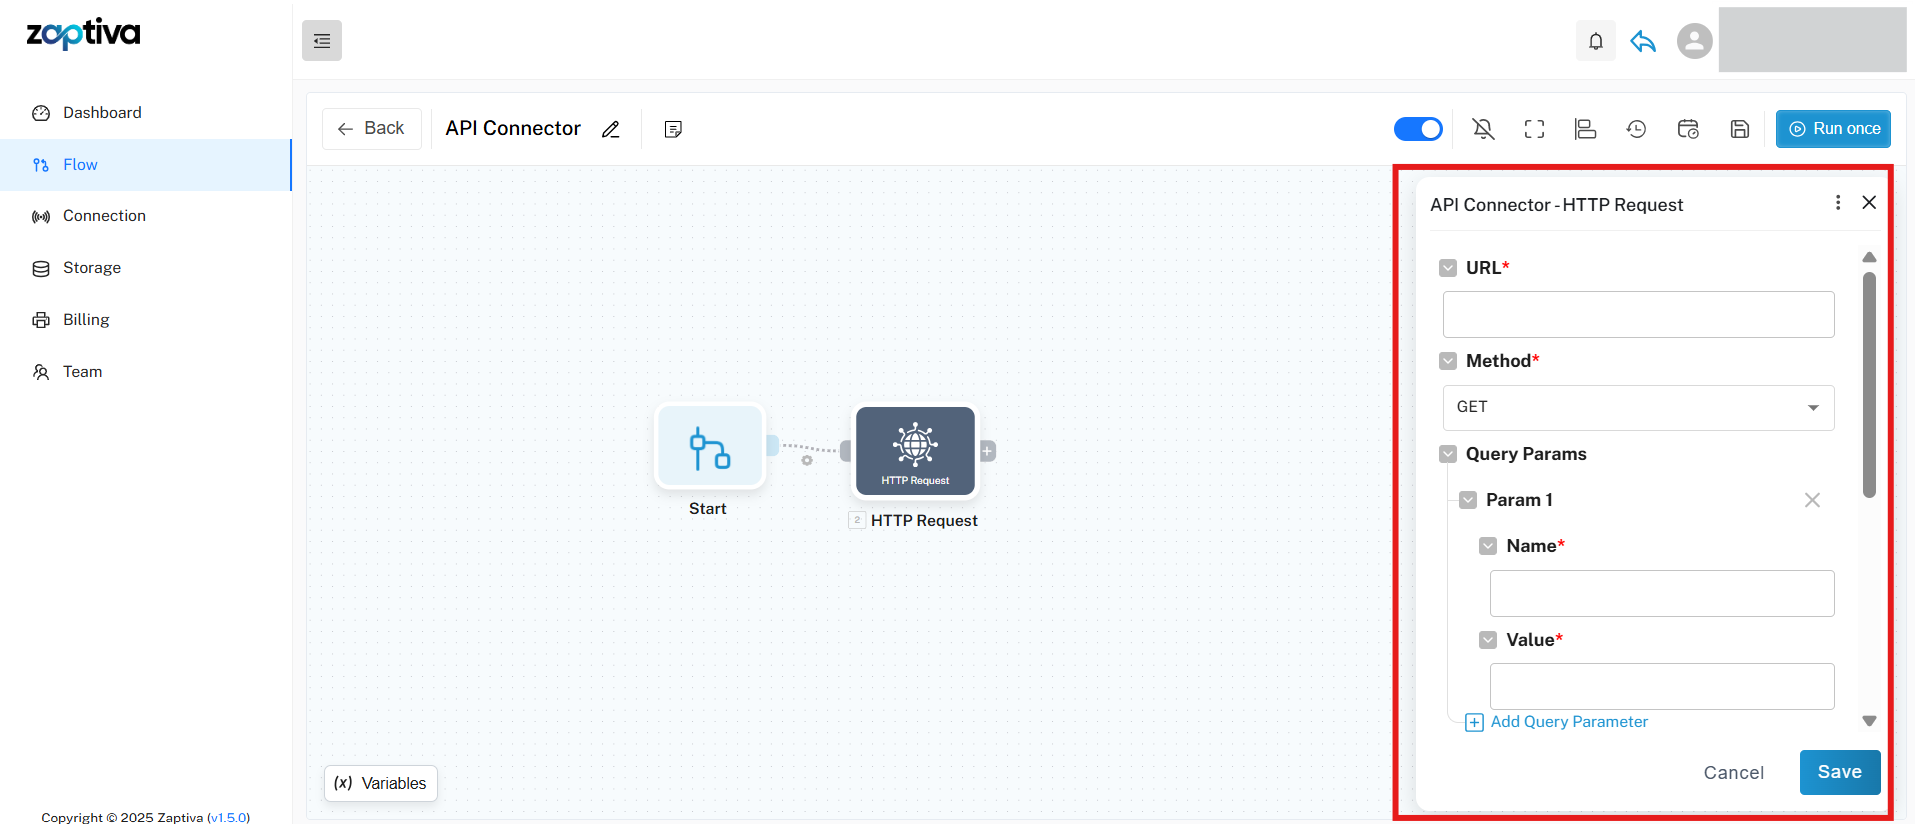
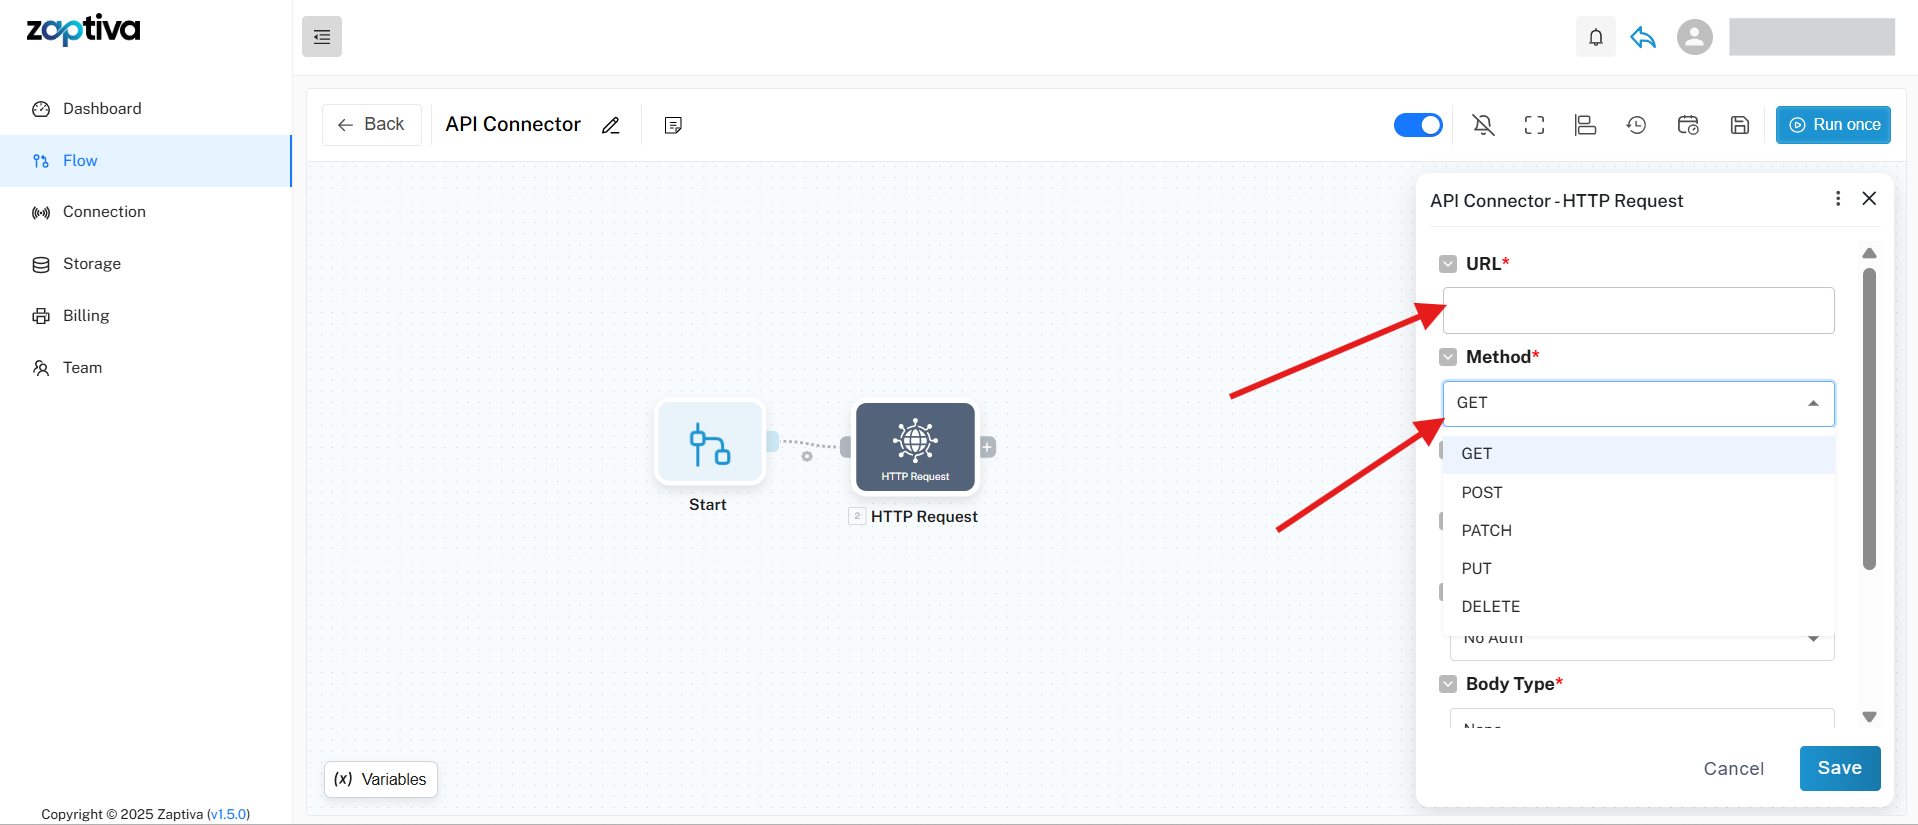
5. Enter the API in the URL field and choose the required HTTP method (GET, POST, PATCH, PUT, or DELETE) to retrieve or send data based on your use case.
6. Add the required Query Parameters and Headers using the “+” icon to filter API requests and pass authentication or request format details.
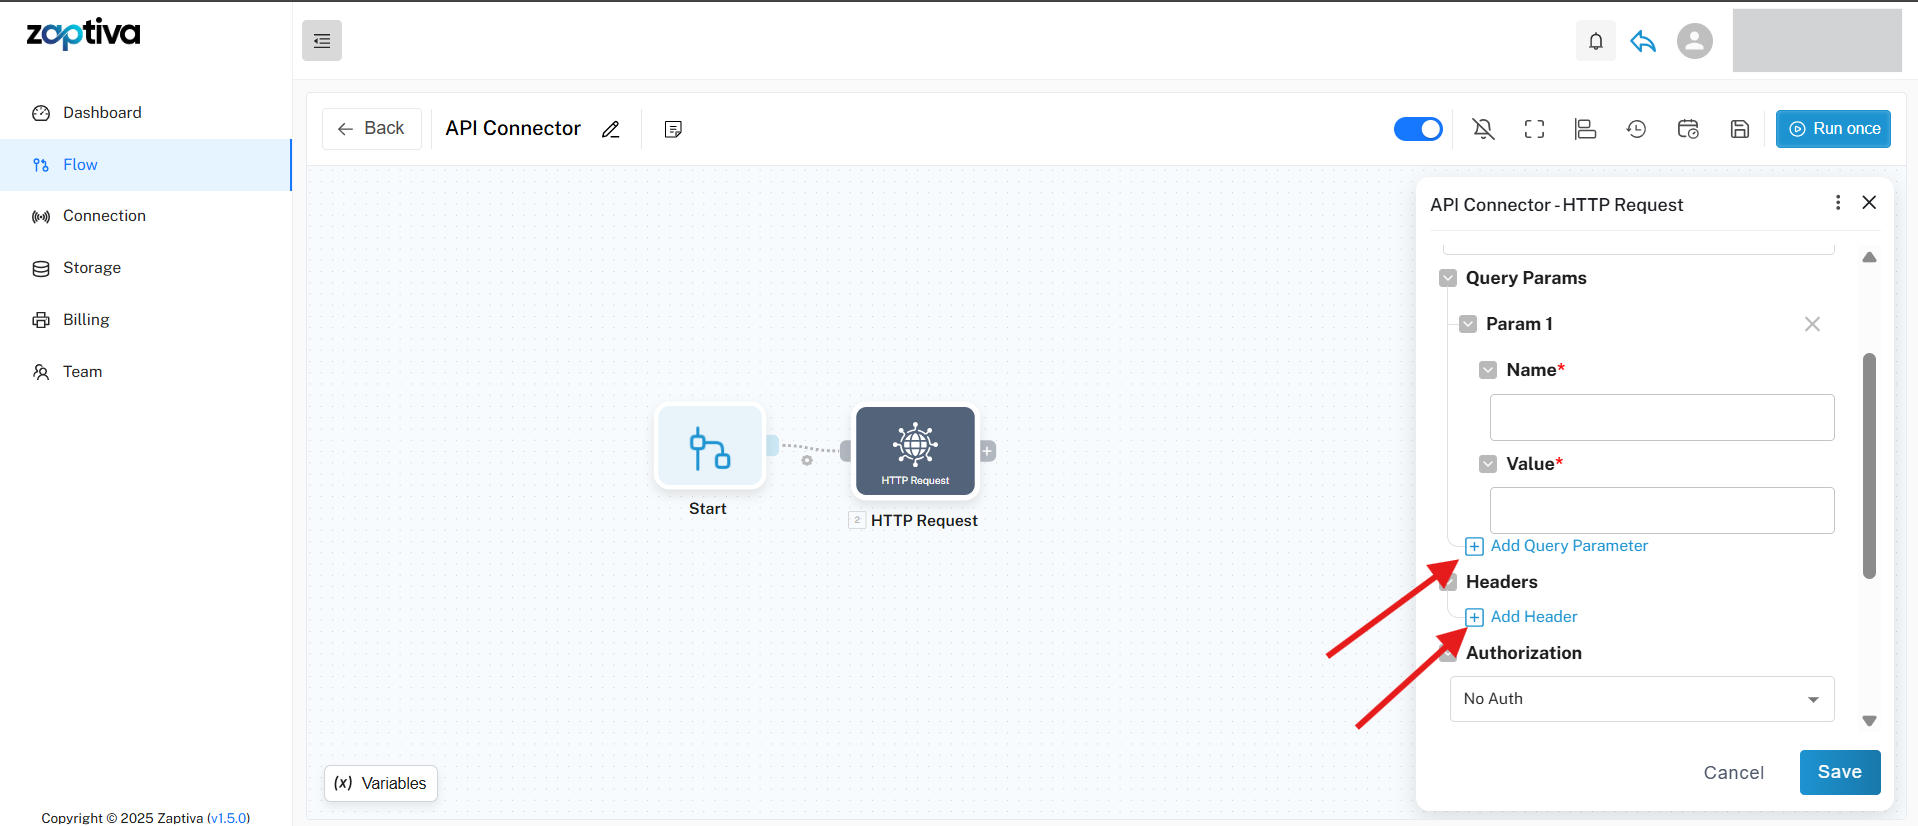
7. Select the required Authorization method from the dropdown. This allows the API to verify your credentials, such as an API key or access token, and ensures that the request is processed securely.
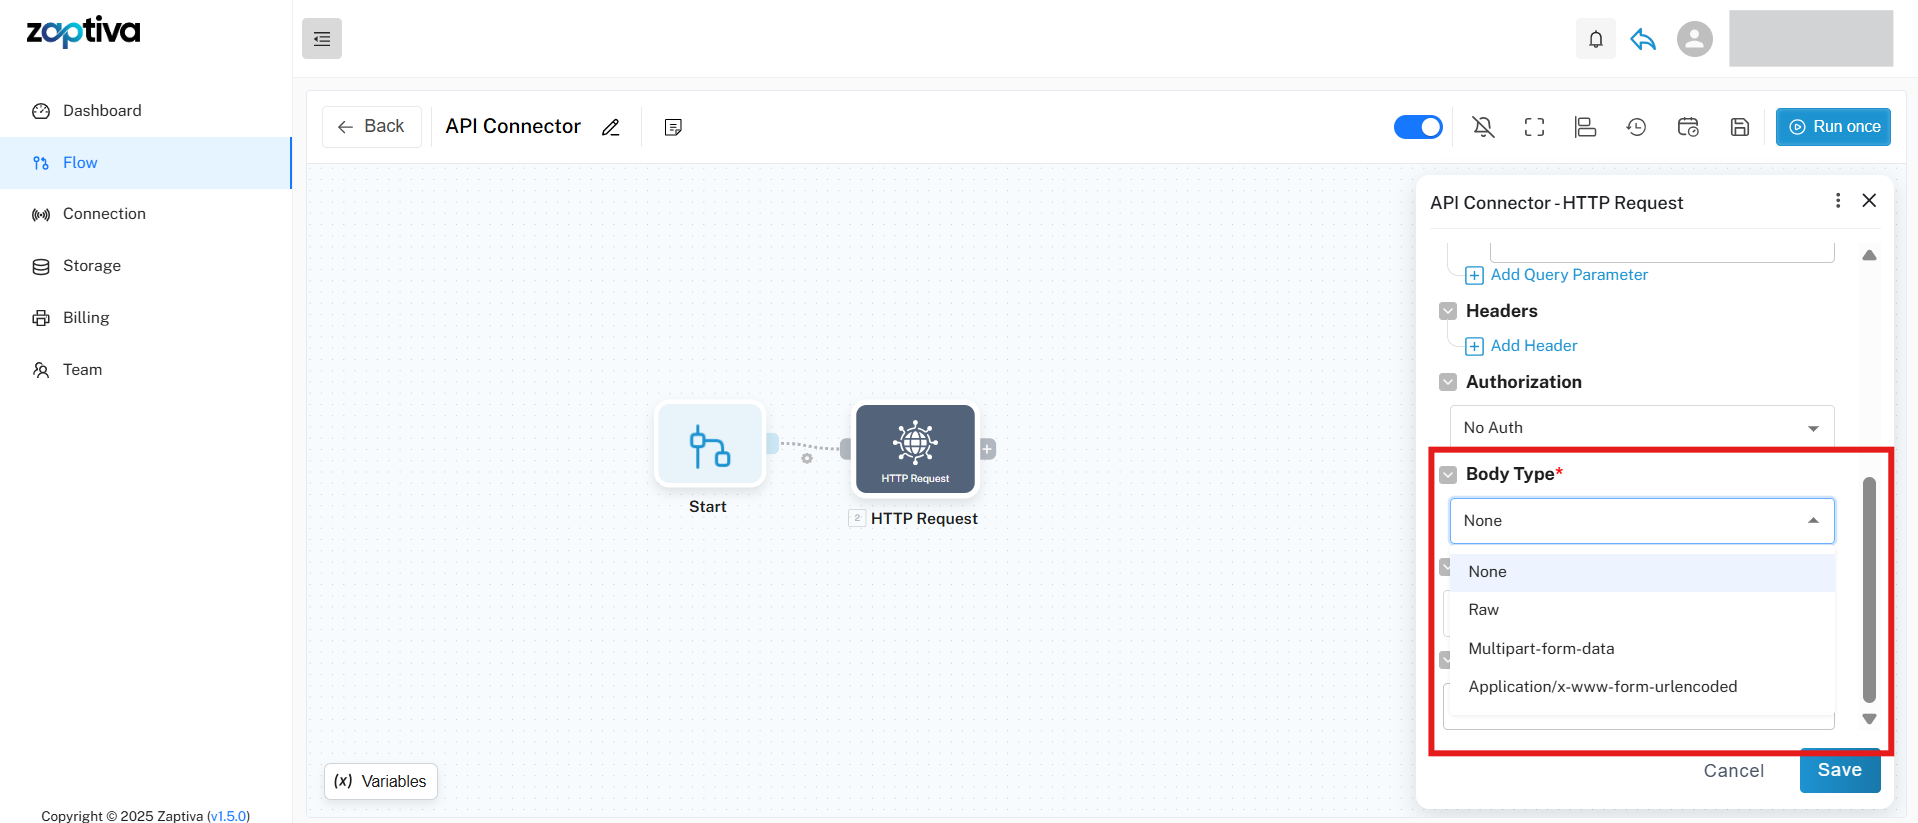
8. Once authorization is set, choose the required Body Type from the dropdown. This is used to pass data to the API when sending or updating information.
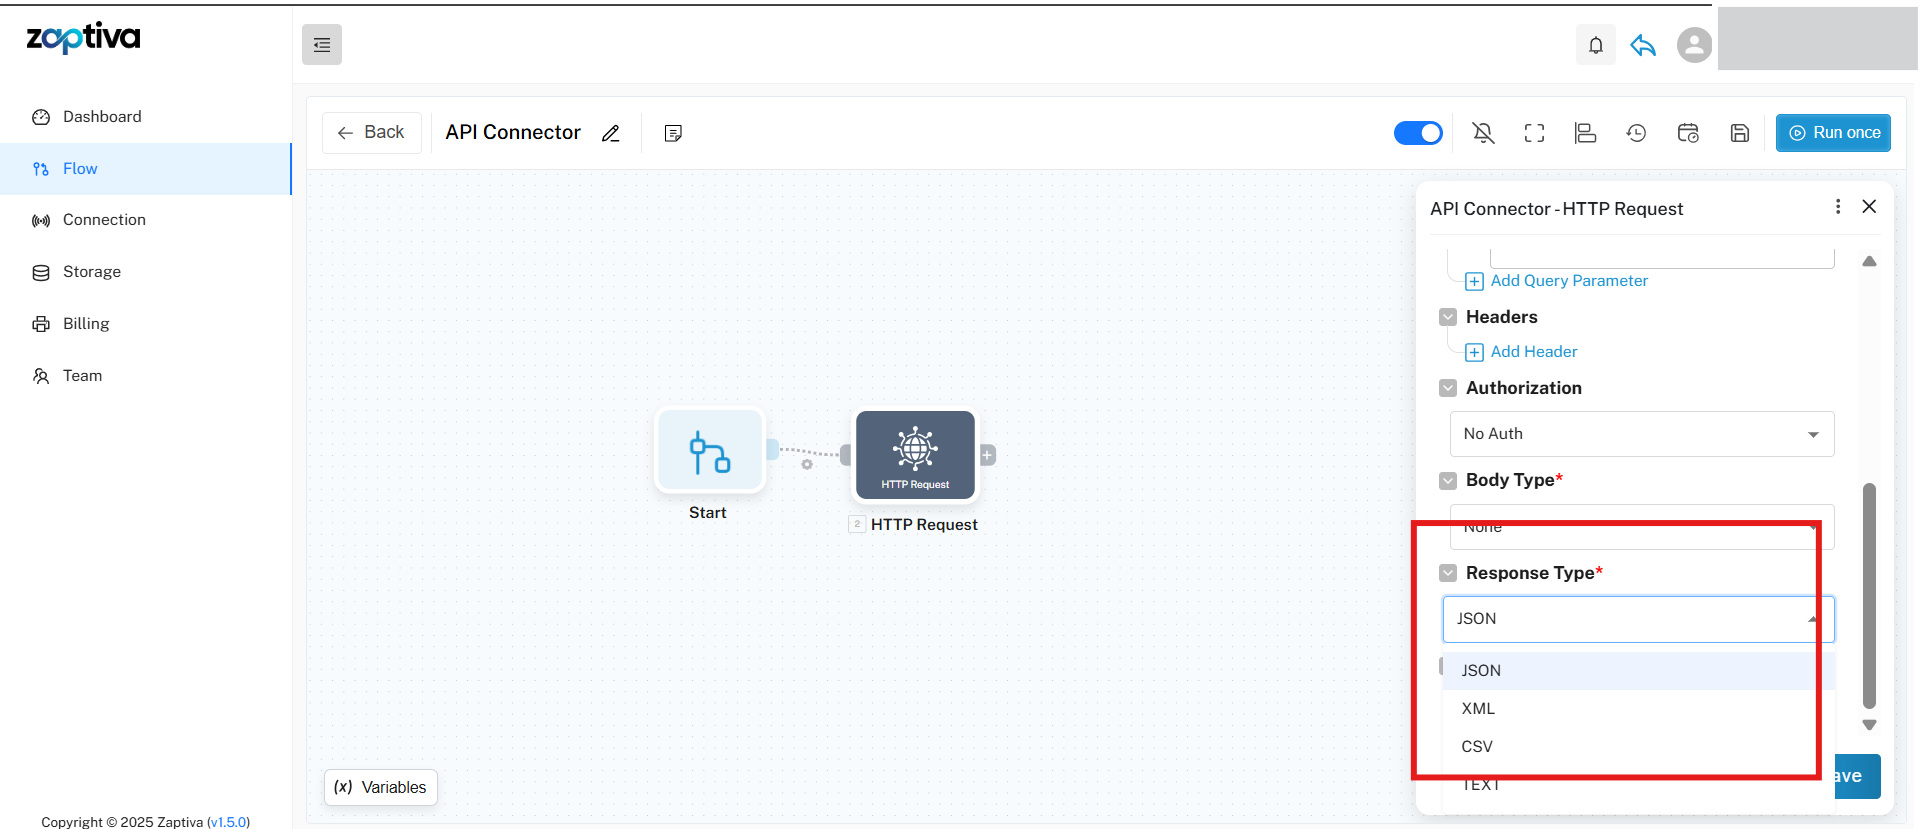
9. Finally, select the Response Type in which you want to receive the API output. Enter a Sample Response to define the response structure, then click the Save button to store the API Connector configuration.
Related Articles
QuickBooks Web Connector: Complete Guide (Open, Auto Run, Kill & Reopen)
1. What is QuickBooks Web Connector? QuickBooks Web Connector (QBWC) is an application that allows external web applications to communicate with QuickBooks Desktop. It acts as a bridge between QuickBooks Desktop and third-party applications such as ...API Key – How to Create and Use for Integration
What is an API Key? An API key is a unique identifier that allows secure communication between Zaptiva and third-party applications. Zaptiva allows users to generate API keys that can be used to securely connect and integrate with external systems. ...Notifications in Zaptiva: Overview and User Guide
1. Notifications in Zaptiva Notifications in Zaptiva help users stay informed about important activities, updates, and system events in real-time. These alerts ensure that users never miss critical actions such as Renewal Subscription status, ...Creating a connection to QuickBooks Desktop
To complete the connection from Zaptiva to QuickBooks using the QuickBooks Web Connector (QWC), please follow the steps below. 1. Connect 2. Install 1. Connect Click on “Connection” option in the left pane. Click on ‘Add Connection’ to open a prompt ...Zaptiva Release Notes
v2.18.1 Beta Release Date: Jun 04, 2026 MAJOR FEATURE: Process Failed Records Capability: Introduced a new option that allows failed records/transactions to continue processing through downstream components instead of stopping the flow for those ...