Creating a connection to Sage Intacct
Follow the steps below to create a connection to Sage Intacct in Zaptiva:
Connect
1. Log in to your Sage Intacct account to approve the authorization and allow Zaptiva to access your Sage Intacct account, navigate to the Company Information page in Sage Intacct using the path shown below:
From the top menu, go to Applications
Select Company
Under the Setup tab, click Company
Open the Security tab on the Company Information page
2. If your company already has a Web Services user configured for the Zaptiva integration, you can skip this step.
If not, you must create a new Web Services user in Sage Intacct by following these steps:
On the Company Information page, open the Security tab.
Locate the Web Services Authorization section.
Click Edit to enable changes.
Click Add to create a new Web Services user.
3. After clicking Add, the Web Services Sender Information pop-up opens. Enter the required details, set the Sender ID to "
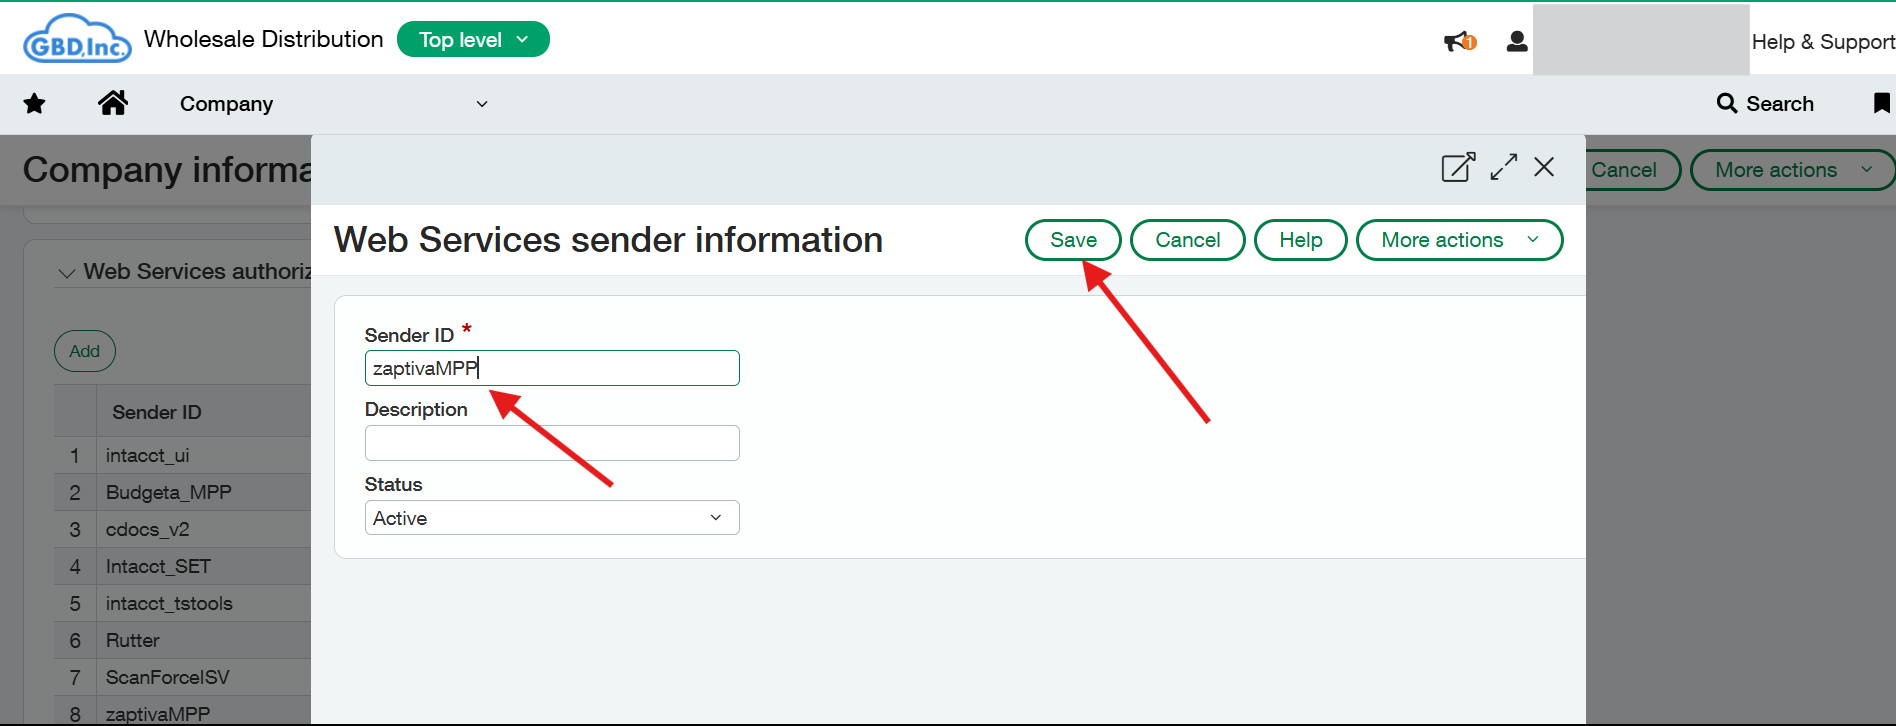
zaptivaMPP", and click Save to complete the configuration. 4. To authorize the Zaptiva application, click Add under the Authorized Client Applications section. In the pop-up window, enter the Client ID provided by the Zaptiva support team, then enter the Web Services User ID created in the previous steps (zaptivaMPP), and click Save to complete the authorization.
5. Once you have completed the authorization process in Sage Intacct, navigate to the URL: https://app.zaptiva.com/ and log in to your Zaptiva account.
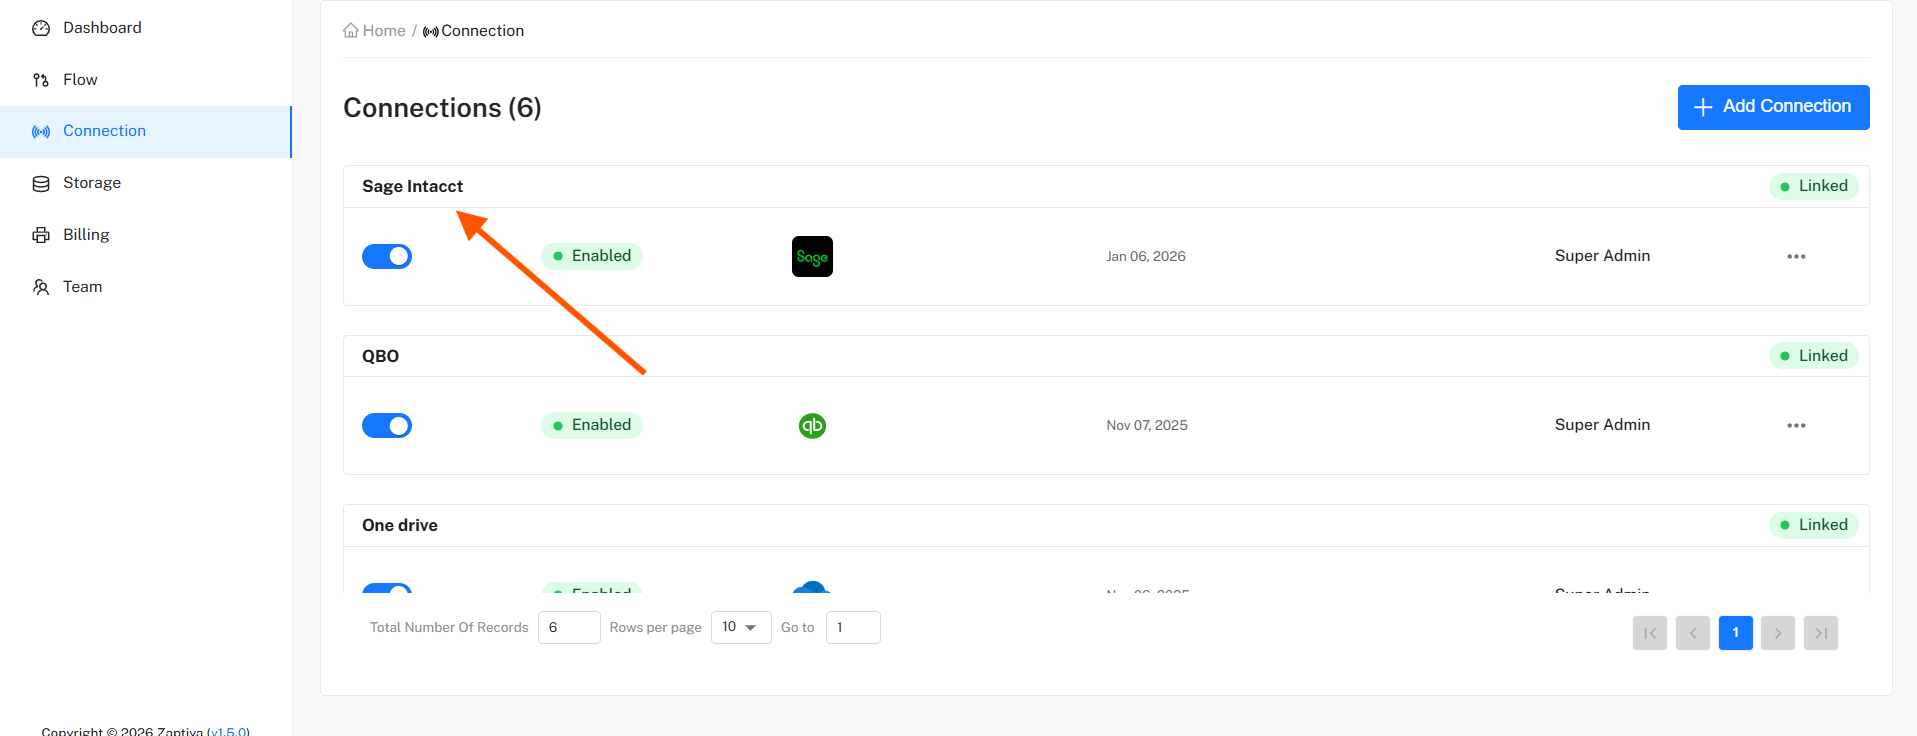
6. Click on “Connection” option in the left pane.
7. Click on “Add Connection” which will prompt you for connection name. Let’s enter the name of the connection as “Sage Intacct” & select the App name as "Sage Intacct".
8. After entering all the required details in the Add Connection pop-up, click Next. You will be redirected to the Sage Intacct login pop-up. Enter your Sage Intacct credentials in the required fields and then click Login to continue.
9. After clicking Login, you will be redirected back to Zaptiva. The Sage Intacct connection setup will be completed, and the connection will be ready to use in your flows.
Related Articles
Creating a connection to QuickBooks Desktop
To complete the connection from Zaptiva to QuickBooks using the QuickBooks Web Connector (QWC), please follow the steps below. 1. Connect 2. Install 1. Connect Click on “Connection” option in the left pane. Click on ‘Add Connection’ to open a prompt ...Creating a connection to QuickBooks Online
To complete the connection from Zaptiva to QuickBooks Online, please follow the steps below. Connect Click on “Connection” option in the left pane. Click on “Add Connection” which will prompt you for connection name. Let’s enter the name of the ...Creating a connection to Box
To complete the connection from Zaptiva to QuickBase, please follow the steps below. Connect 1. Click on “Connection” option in the left pane. 2. Click on “Add Connection”, which will prompt you to enter a connection name. Enter the desired ...Creating and Using a Quickbase Service Account for Pipelines
Creating and Using a Quickbase Service Account for Pipelines Purpose This article defines the recommended and supported process for creating and using a Quickbase Service Account in a customer’s Quickbase realm when implementing Pipelines. The ...Deleting a connection to QuickBooks Online/QuickBooks Desktop
Delete connection to QuickBooks Online/Desktop Follow the steps below to delete an existing QuickBooks Online connection in Zaptiva: Navigate to the URL: https://app.zaptiva.com/ Log in to your Zaptiva account. Navigate to "Connections" from the ...